
How to set up an Nvidia GPU for PyTorch on a local machine for use with Jupyter Notebook
3 minute read
In this article I will show step-by-step on how to setup your GPU for train your ML models in Jupyter Notebook or your local system for Windows (using PyTorch).
Requirements
- Python (latest version)
- Anaconda (latest version)
- Visual Studio (latest version)
For Visual Studio you will have to install certain workloads which will then automatically install C++ libraries required for CUDA.
Visual Studio Installation
Step 1: Go to Visual Studio website here and download the installer.
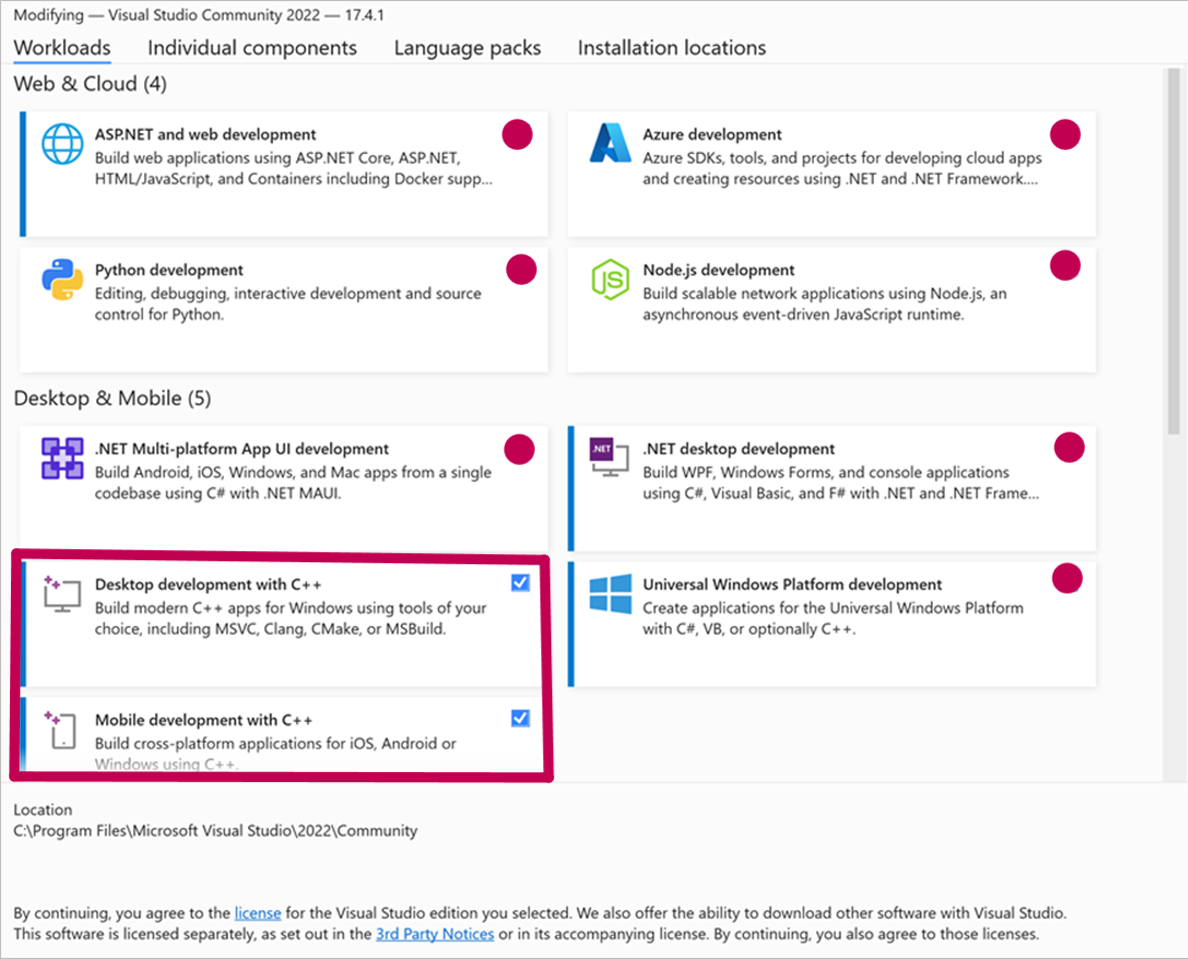
Step 2: While installing you will come on workloads page. Select Mobile Development with C++ and Desktop Development with C++, keep rest the same. It may take some time to install.
CUDA Toolkit and cuDNN installation
Note:- Visual Studio must be installed before attempting this.
Installing CUDA Toolkit
- Download CUDA from official website here, and install it.
Installing cuDNN
- This step can be slightly tricky.
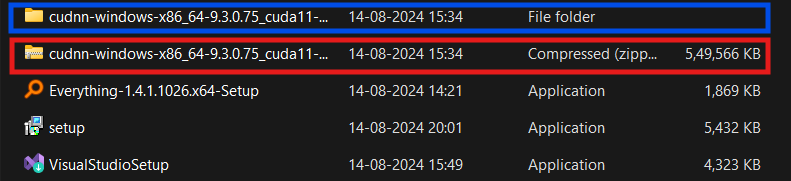
- Download cuDNN from Official website here. It will download a zip file then extract it (shown below).
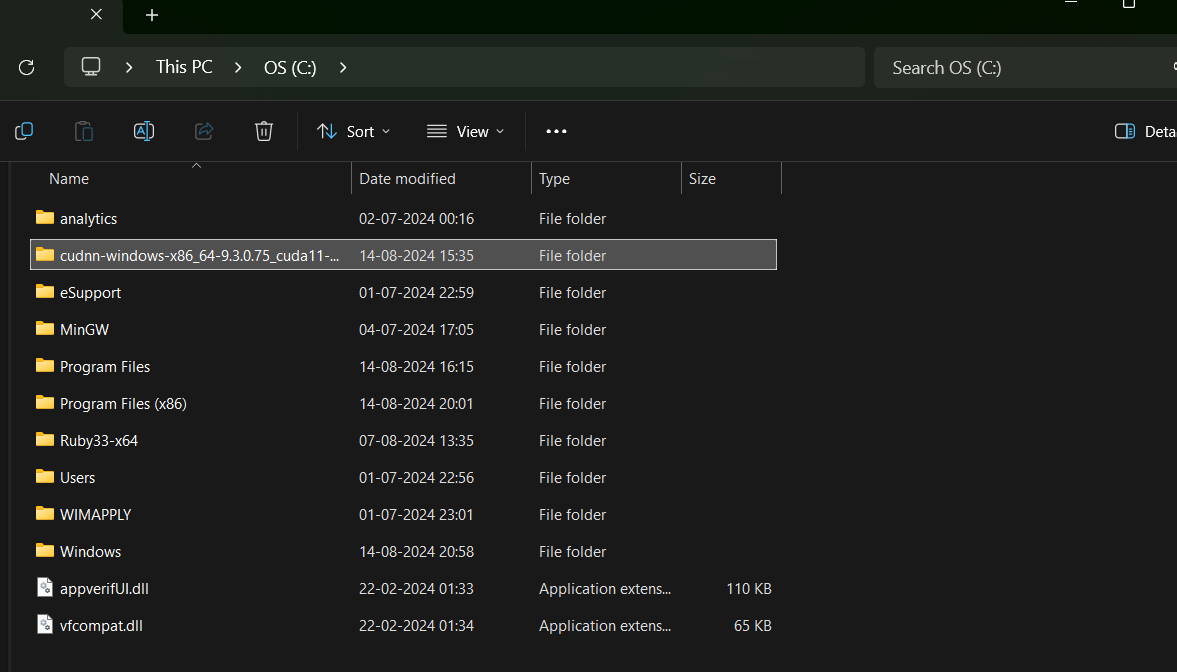
- Once extracted, copy the extracted file and past it into your C drive.
Adding cuDNN to Environment Variable
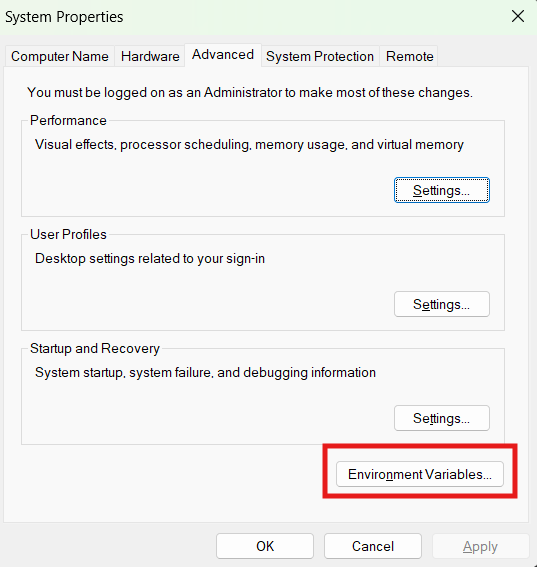
- You will now have to add cuDNN to you Environment Variable. In the windows search type “edit the system environment variable” and Enter. You will come to this screen then click Environment Variable button.
- It will take you inside, then double click on path in system variables.
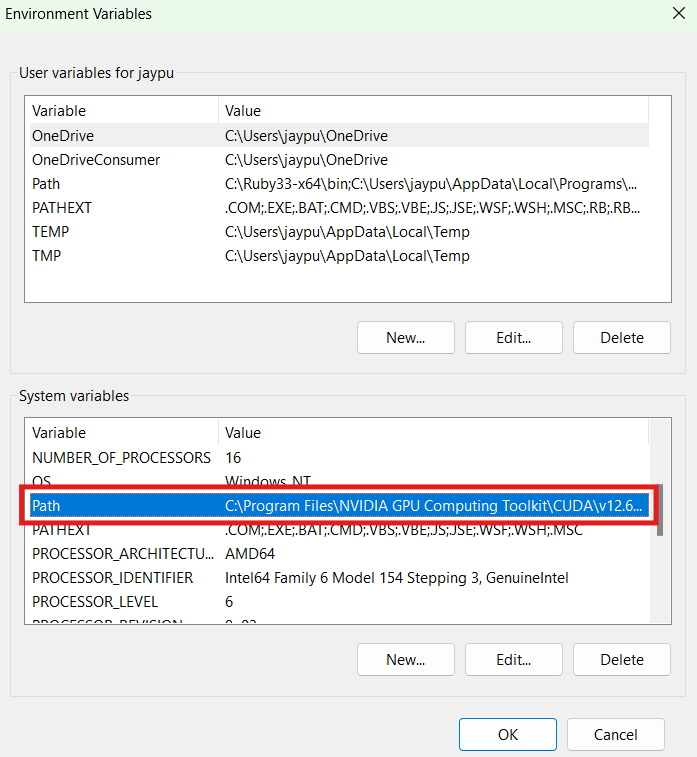
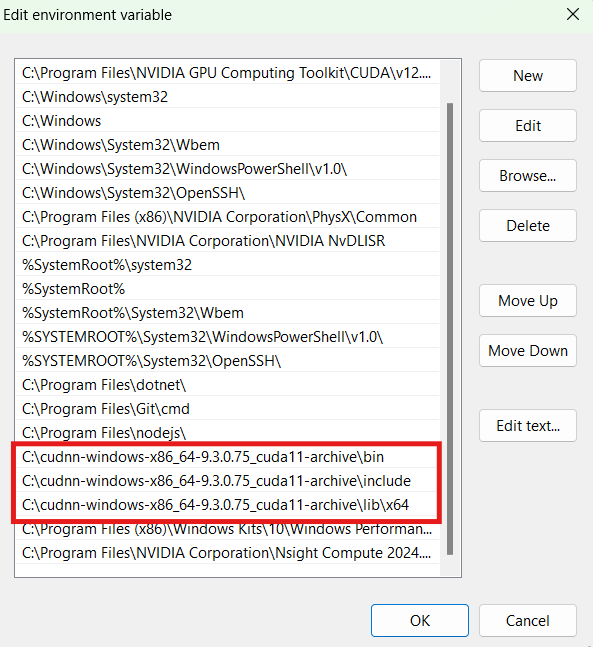
- Inside the system variable path add the path of “bin”, “include”, and “lib/x64” from cuDNN in C drive, and apply the changes.
Now you are done with Downloading and Setting up CUDA and cuDNN.
Creating Virtual Environment with Conda and downloading PyTorch
Now open your Anaconda Prompt and type:
conda create -n envname python
Replace envname with any name you would like to give
To activate the virtual environment type:
conda activate envname
Replace envname with any name you would like to give
Once your virtual environment is activated to PyTorch website Here. On the page you will find the following:
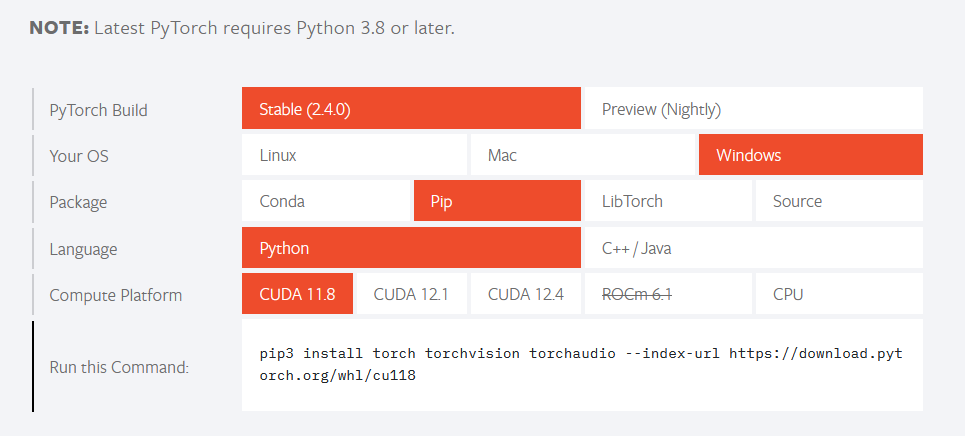
Select the appropriate settings. If your current CUDA version is not there then choose the closest version to it. Paste the below URL to you Anaconda Prompt with virtual environment active.
Using GPU inside Jupyter Notebook with PyTorch
We are almost done now!
Changing environment on Anaconda
Open Anaconda Navigator and go to environments page as shown below.
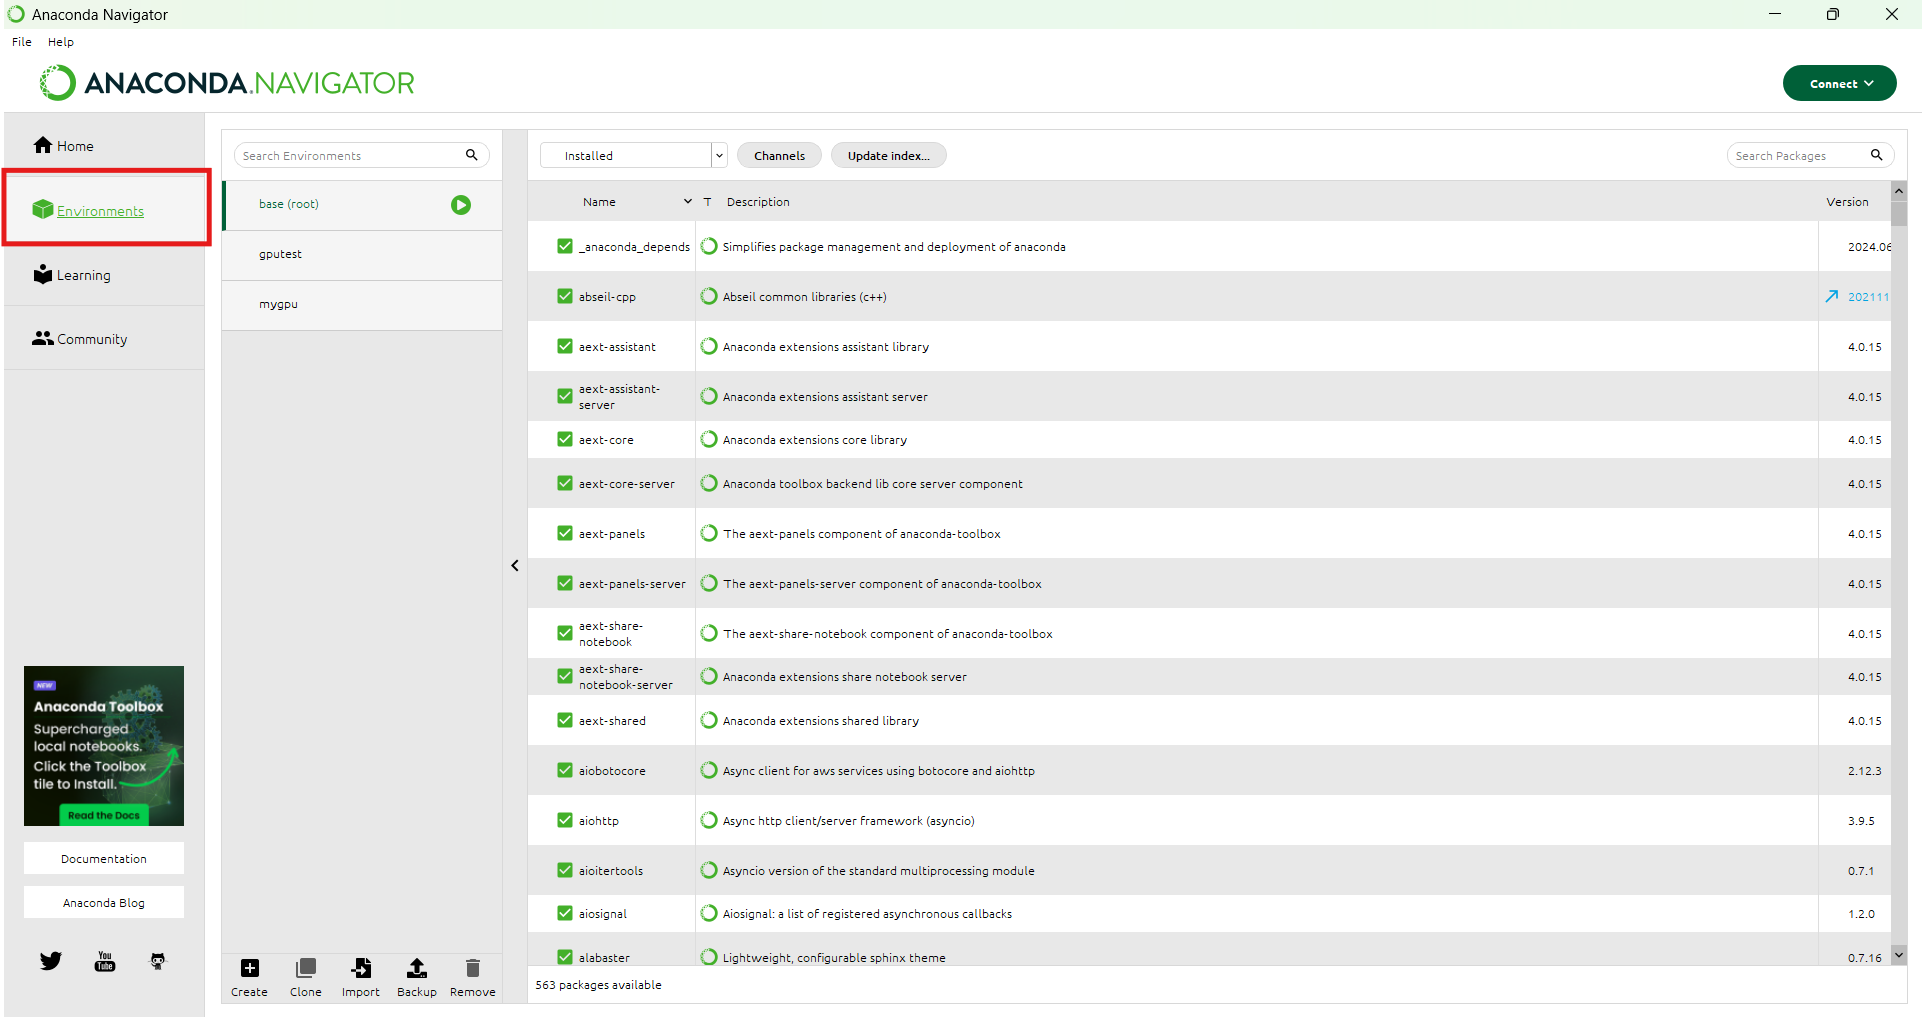
You can also see I have three environments there, base(root), gputest and mygpu. You will see your virtual environment name there. Double click it to select and then go back to home. You will see on top that the environment has changed. Also you will have to install Jupyter Notebook again in the new environment. 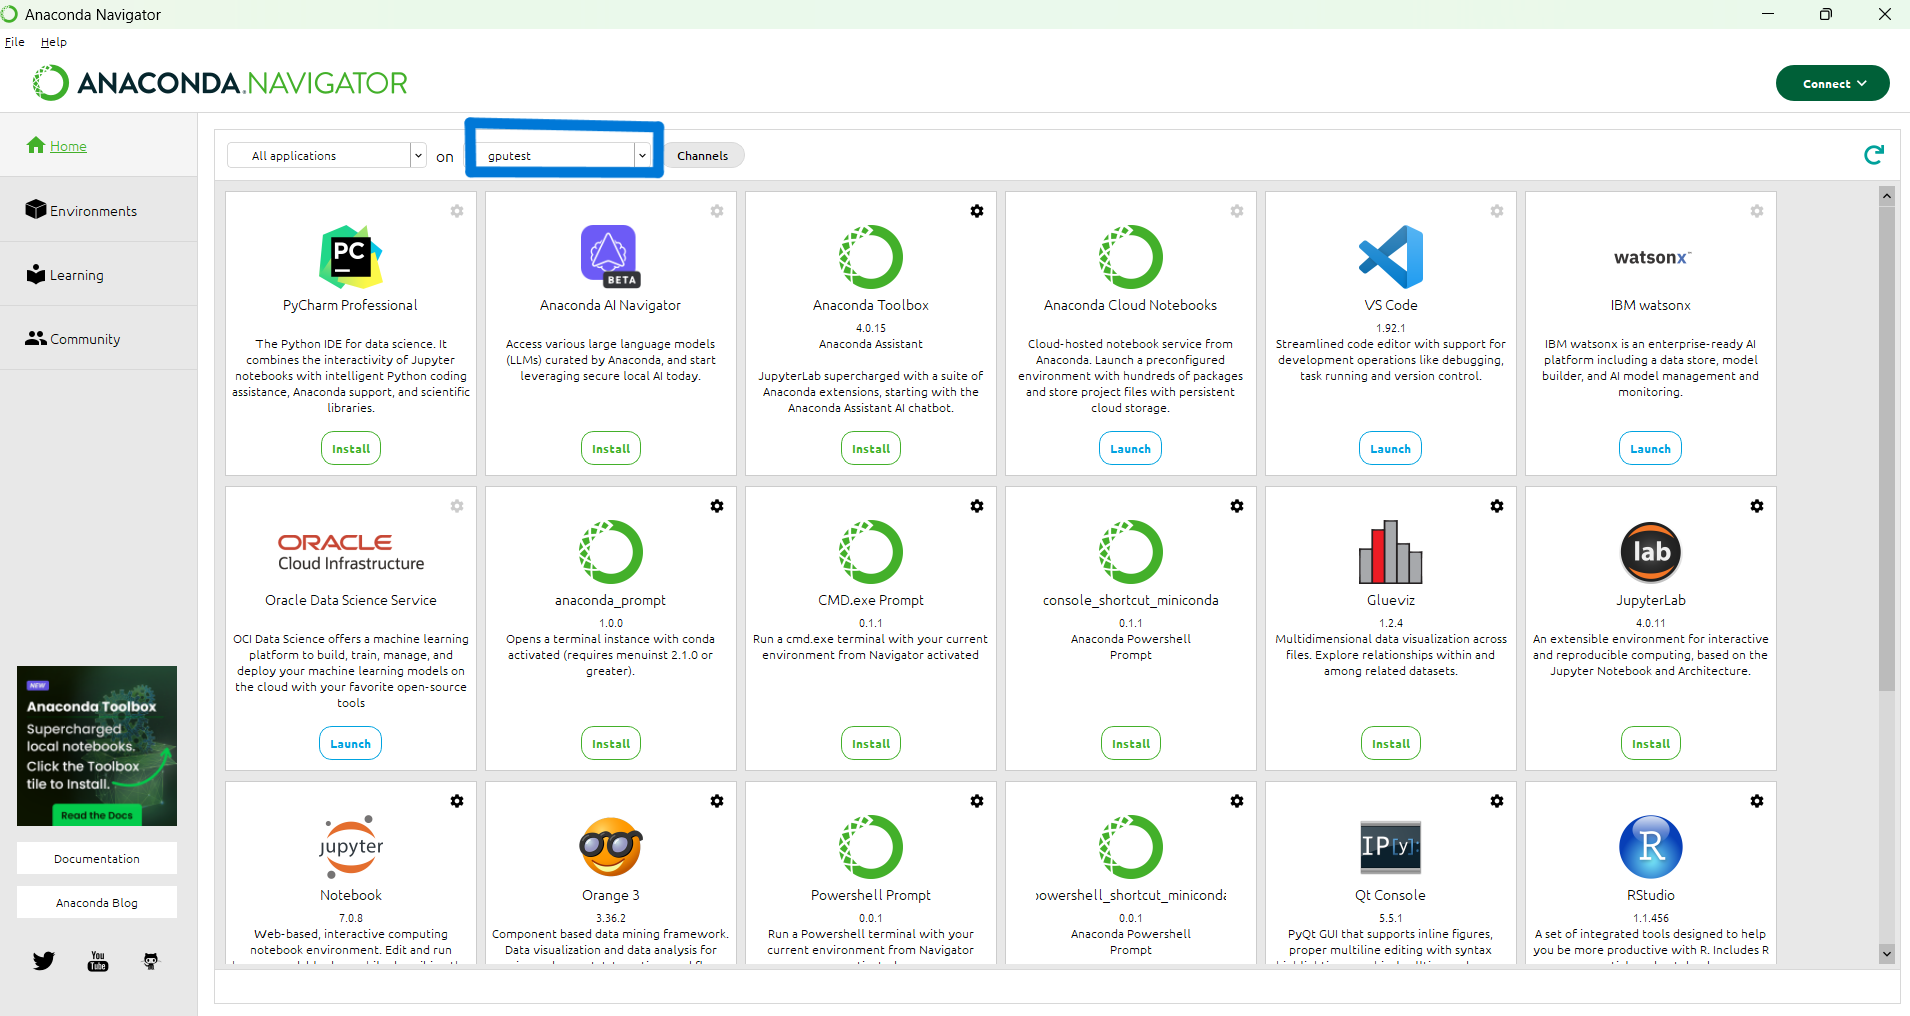
After installation launch Jupyter though Anaconda Navigator when the appropriate virtual environment is selected.
Final testing inside Jupyter Notebook
Once Jupyter Notebook is open write the following commands to check weather CUDA is working properly.
import torch
torch.cuda.is_available()
torch.cuda.current_device()
torch.cuda.get_device_name(0)
The output should be as follows
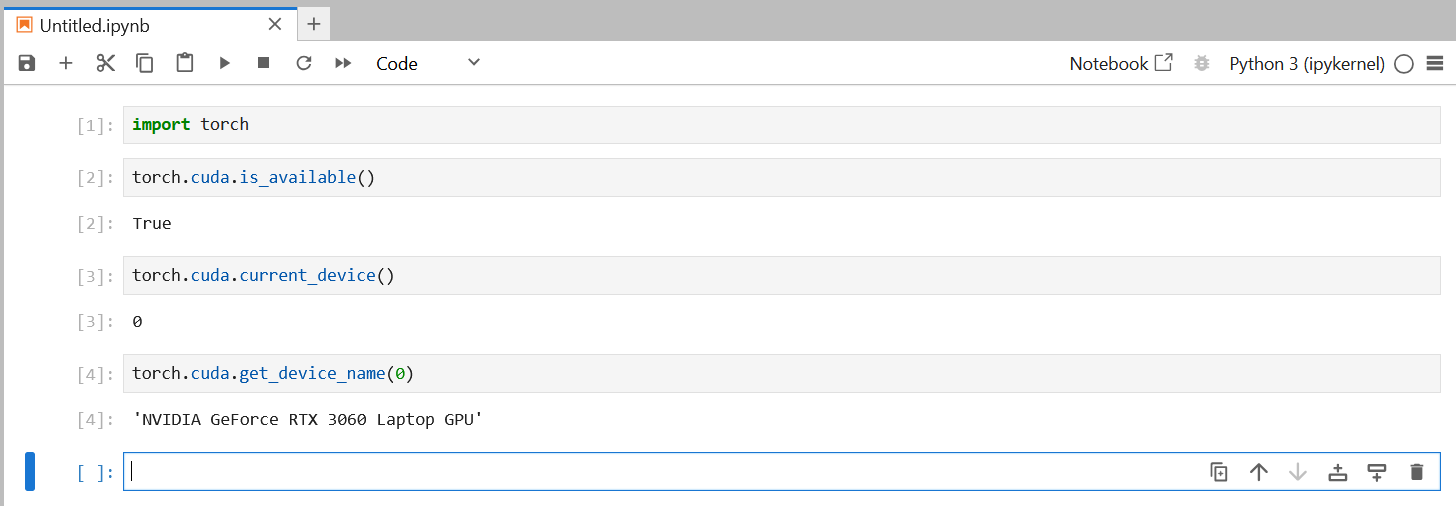
Congratulation! Now you can successfully use your GPU for training and testing your PyTorch models in Jupyter Notebook. If you wish to run it in your local system then activated your virtual environment in Anaconda Prompt and run you code there.