
Deploying Your AI Model: Effortless Gradio + Hugging Face Integration
5 minute read
This tutorial is divided into two parts:
- Part 1: Creating a model (Part 1)
- Part 2: Deploying the model
Introduction
In the last blog, we built a Computer Vision model using Fastai and saved it as a .pkl file. In this blog, we’ll learn how to deploy that model on the web or use it directly through an API.
Hugging Face is a popular platform that provides tools and services for hosting and sharing machine learning models. Gradio is an easy-to-use library that helps you create user interfaces for your models, making them accessible and interactive.
We’ll use these tools to deploy our model and make it available online.
Prerequisites
Before we get started with deploying our model, make sure you have the following:
- Basic Understanding of Machine Learning: Familiarity with basic concepts of machine learning and computer vision will be helpful.
- Fastai Model: You should have a model saved as a
.pklfile from the previous blog. - Python Environment: Ensure you have Python installed on your system. We’ll be using Python for deploying the model.
- Gradio and Hugging Face Accounts: Sign up for accounts on Gradio and Hugging Face, as you’ll need them to deploy and host your model.
- Basic Knowledge of APIs: Understanding how APIs work will help you use and test your deployed model.
With these prerequisites, you’ll be ready to follow along and deploy your model successfully.
Step-by-Step Instructions:
Creating a Hugging Face Space
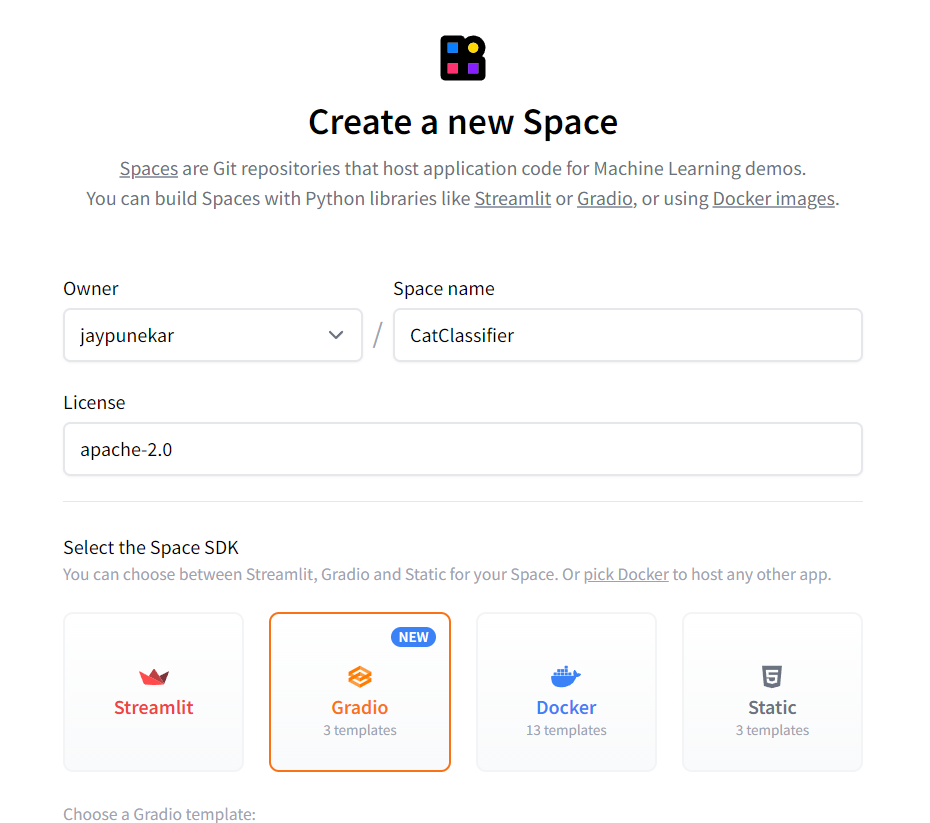
First, you need to have a Hugging Face account. After you have it, go to https://huggingface.co/spaces and create a new space.

Choose Gradio as the template for your space. You can name your space anything you like. For example, I named mine “CatClassifier.”
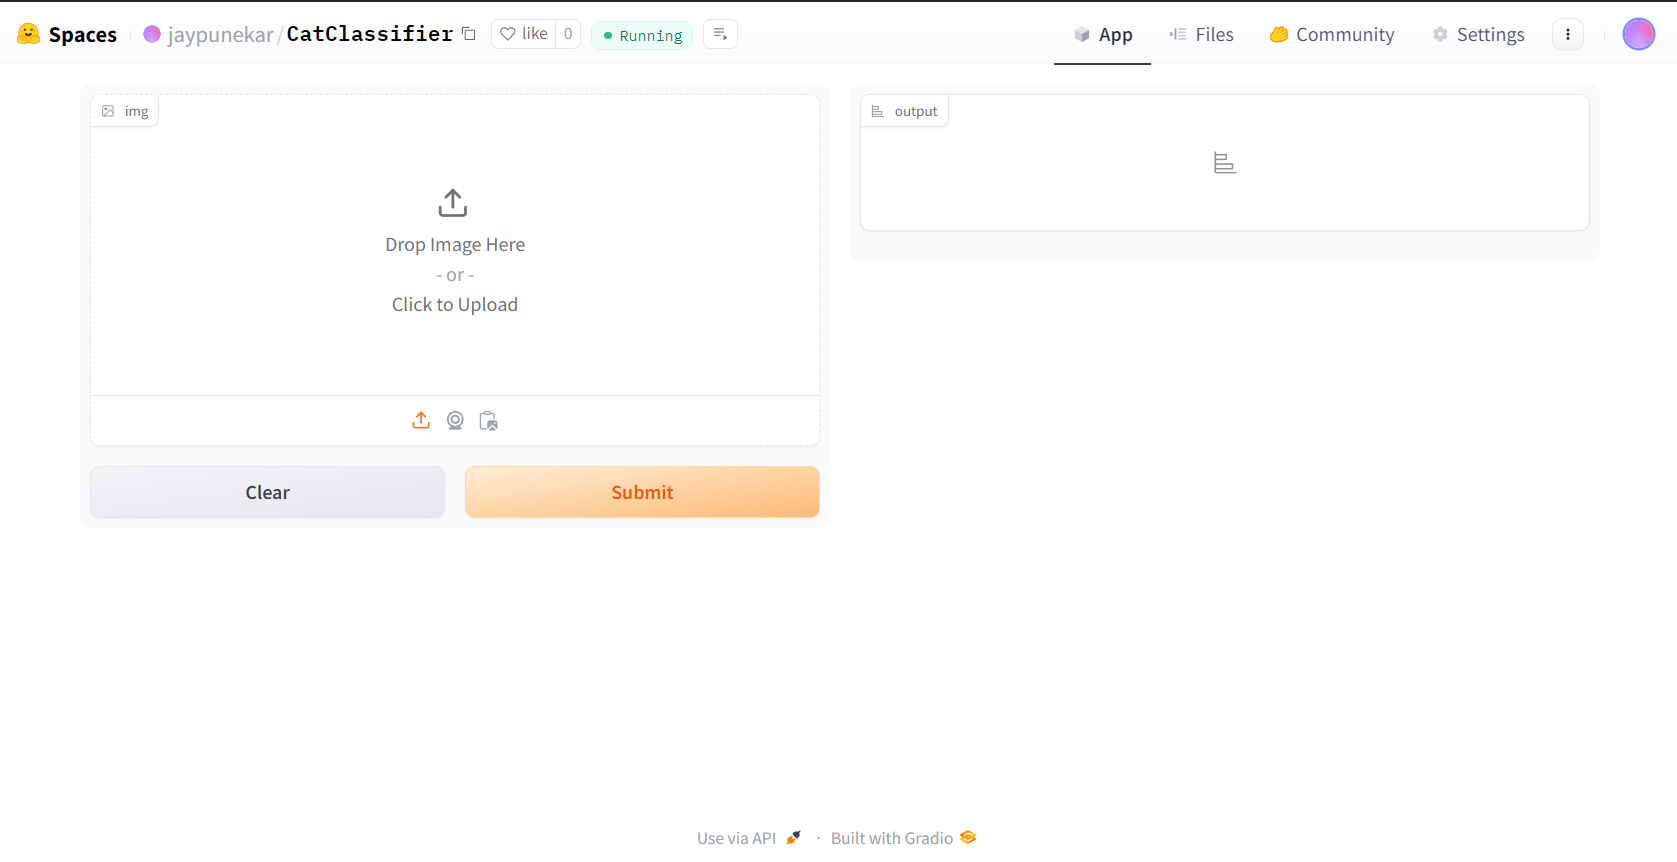
Once your space is created, it will look like this. On the top right corner, you’ll see a “Files” section. Click on that.
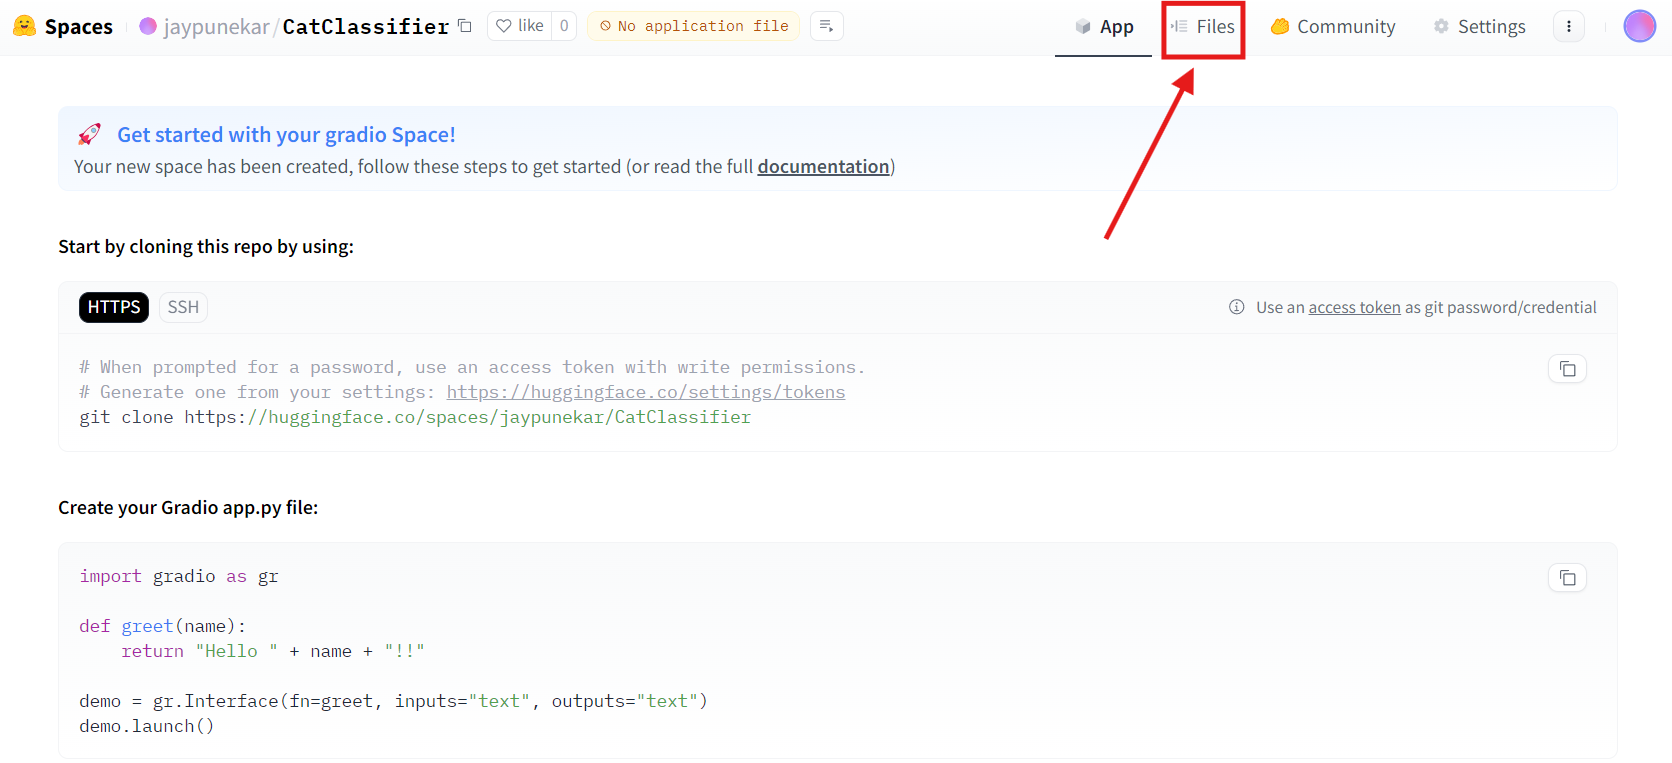
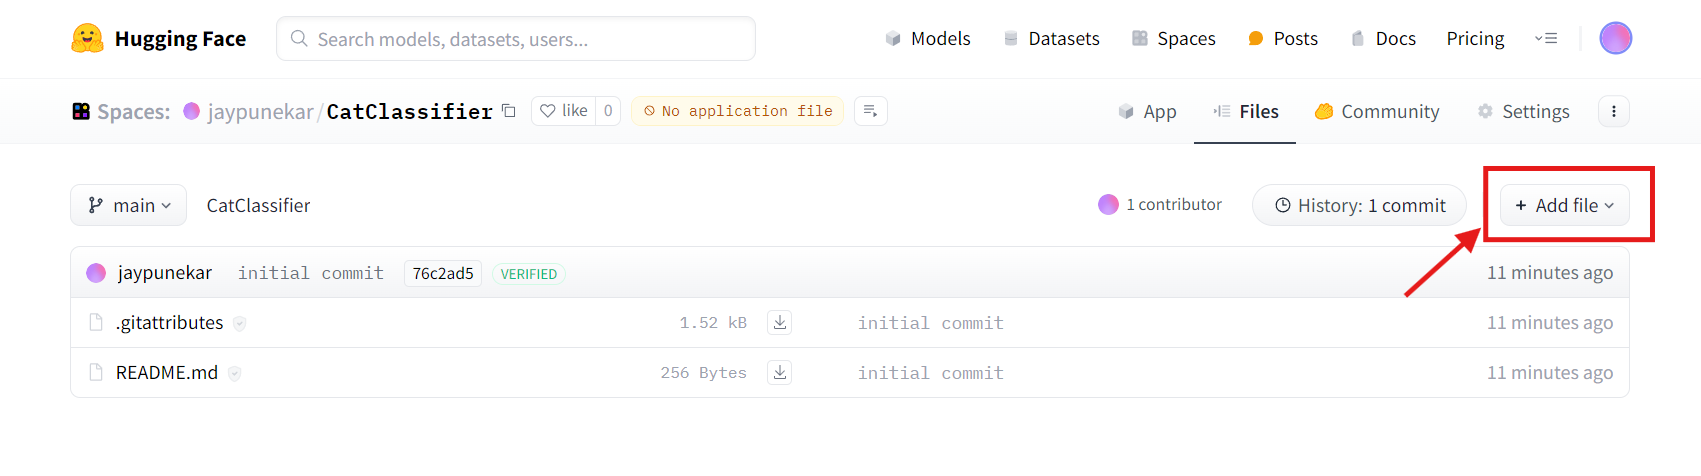
The best way to work is by cloning the space (like on GitHub), making your changes, and then committing them. For this app, we only need three files: app.py, export.pkl, and requirements.txt. So, we will add these files directly. Remember, the requirements.txt file is very important because it lists all the libraries your app needs. If it’s missing, your app will not work and will show an error.
Creating app.py and requirements.txt Files for Deployment
app.py
I will assume you already have the export.pkl file from our last blog. Start by uploading that file first. Once the model is uploaded, we will create the app.py file.
We will use Gradio to build our web app. Create a new file named app.py (you can create it anywhere on your computer) and add the following code. If you are using your own model, you might need to make some changes. You can check the Gradio documentation for more details.
import gradio as gr
from fastai.vision.all import *
from fastbook import *
import pathlib

plt = platform.system()
if plt != 'Windows': pathlib.WindowsPath = pathlib.PosixPath

ln = load_learner("export.pkl")
catagories = ("House cat", "Wild Cat")

def classify_image(img):
    pred, idx, probs = ln.predict(img)
    return dict(zip(catagories, map(float, probs)))

intf = gr.Interface(fn=classify_image, inputs=gr.Image(), outputs=gr.Label())
intf.launch(inline=False)
This code sets up a simple web interface using Gradio to classify images of cats as either “House cat” or “Wild Cat” using a pre-trained model:
Imports necessary libraries (Gradio, Fastai, etc.).
- Handles path compatibility between Windows and other operating systems.
- Loads a pre-trained model from the file export.pkl.
- Defines categories (“House cat”, “Wild Cat”).
- Classifies images with a function that predicts which type of cat is in the image and returns the probabilities.
- Creates a Gradio interface where users can upload an image, and it outputs the classification result.
Finally, the interface is launched to allow interaction.
requirements.txt
This file lists all the libraries your Gradio app needs. For our app, requirements.txt will include:
fastai
fastbook
Deployment
Deploying
Now that you have completed app.py and requirements.txt, upload both files to the Gradio app. Once you upload them, you will see the deployment screen.
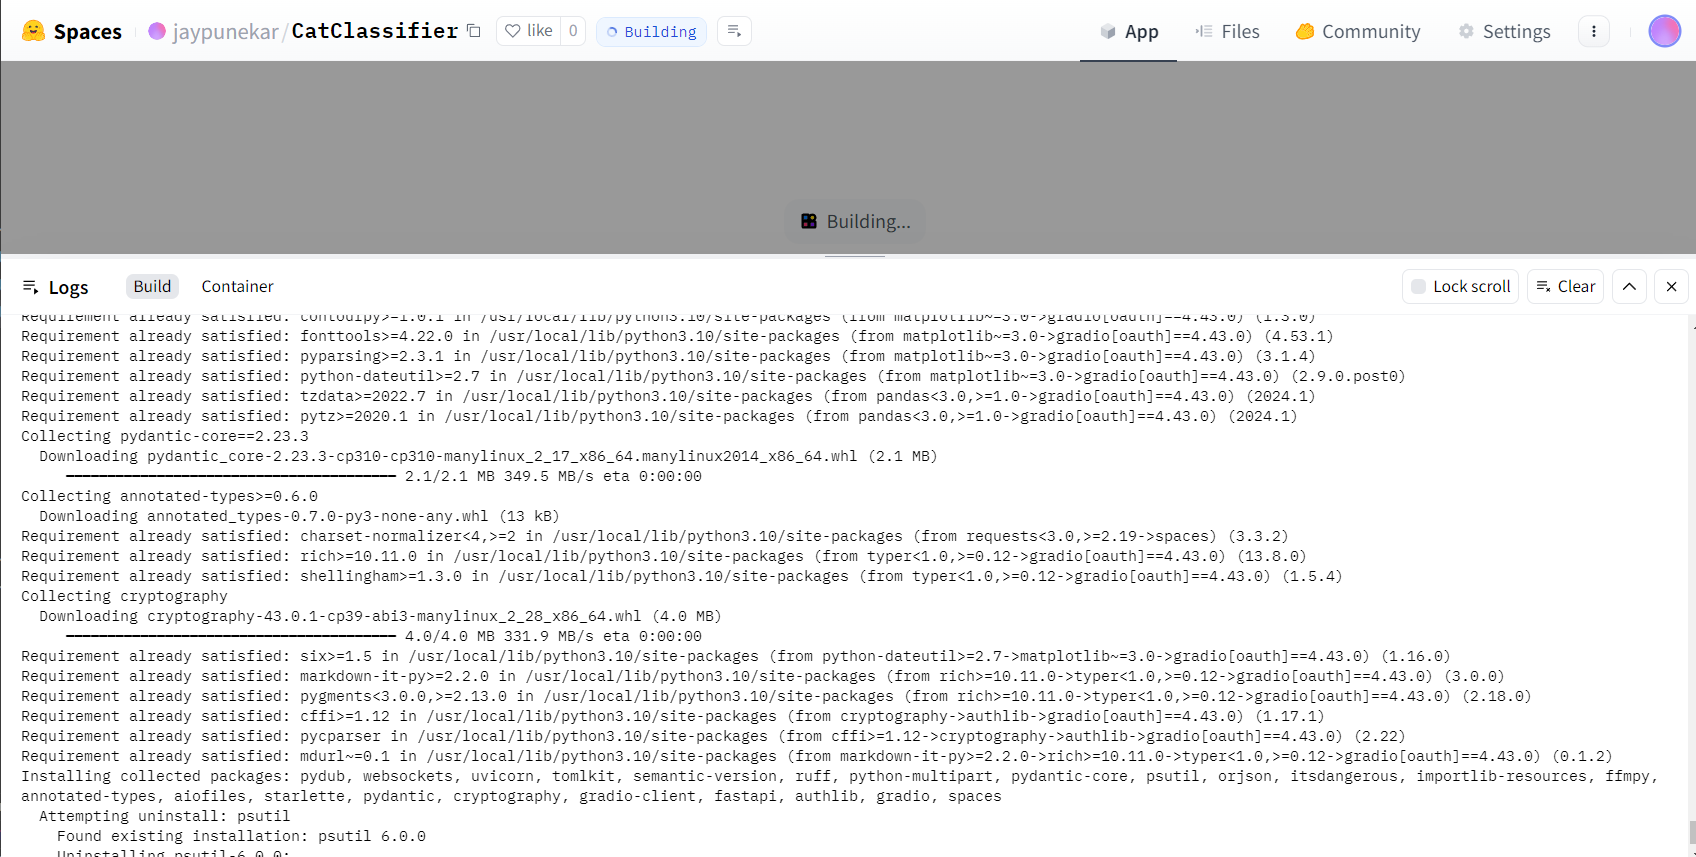
It might take a little time to deploy. When it’s done, you will see a screen like this:
Testing
Next, I will test the app using a random house cat image from the internet.
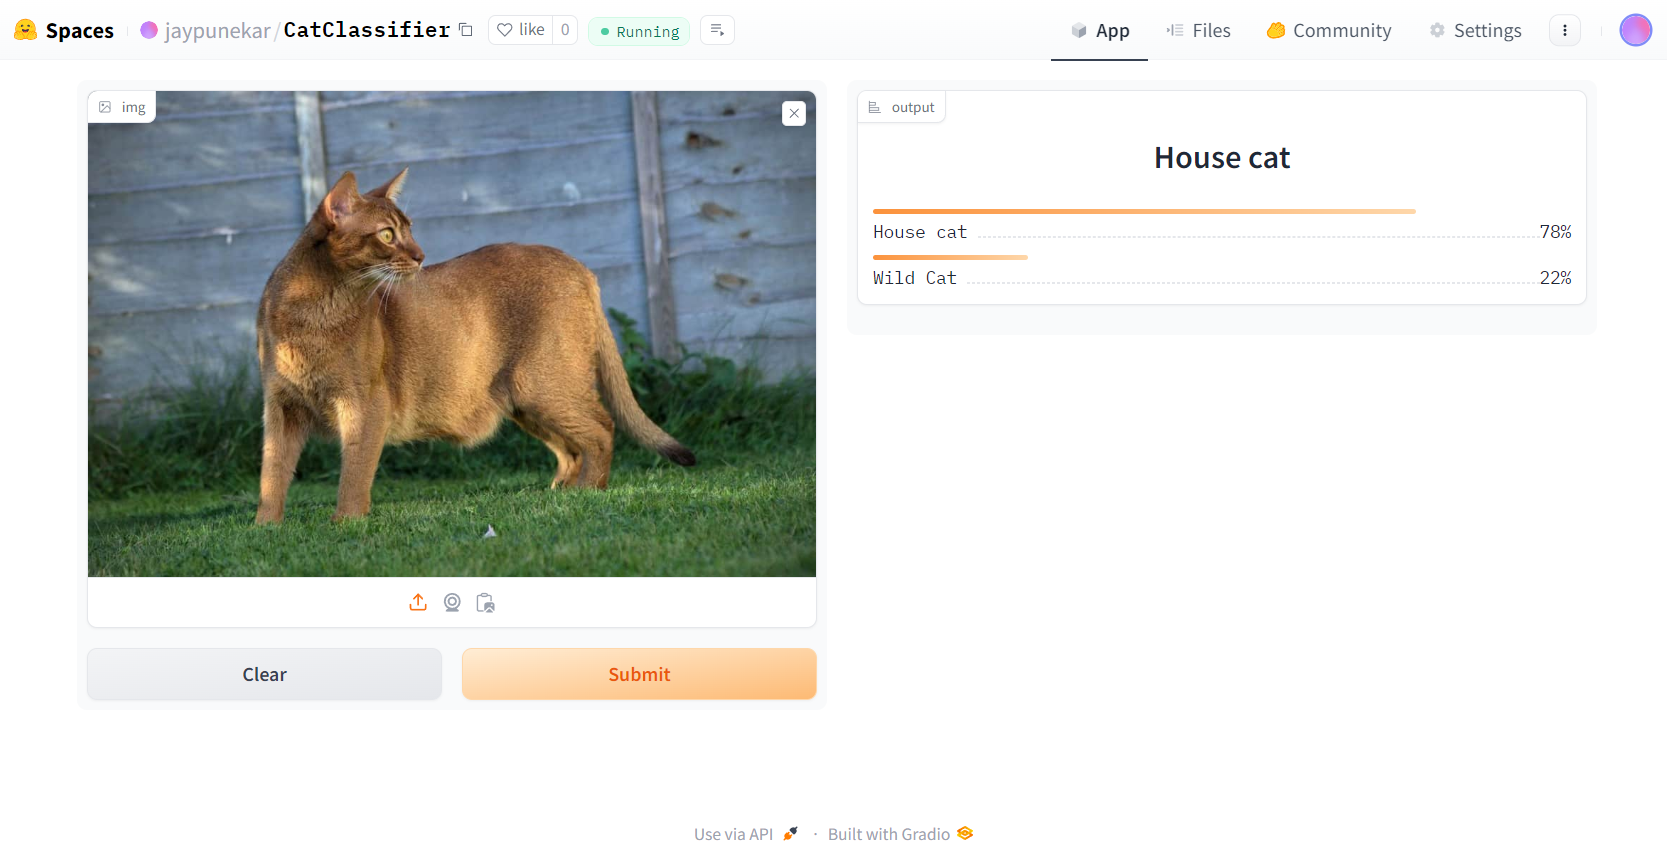
You can see that the app predicts the percentage likelihood of the image being a “House cat” and a “Wild Cat.”
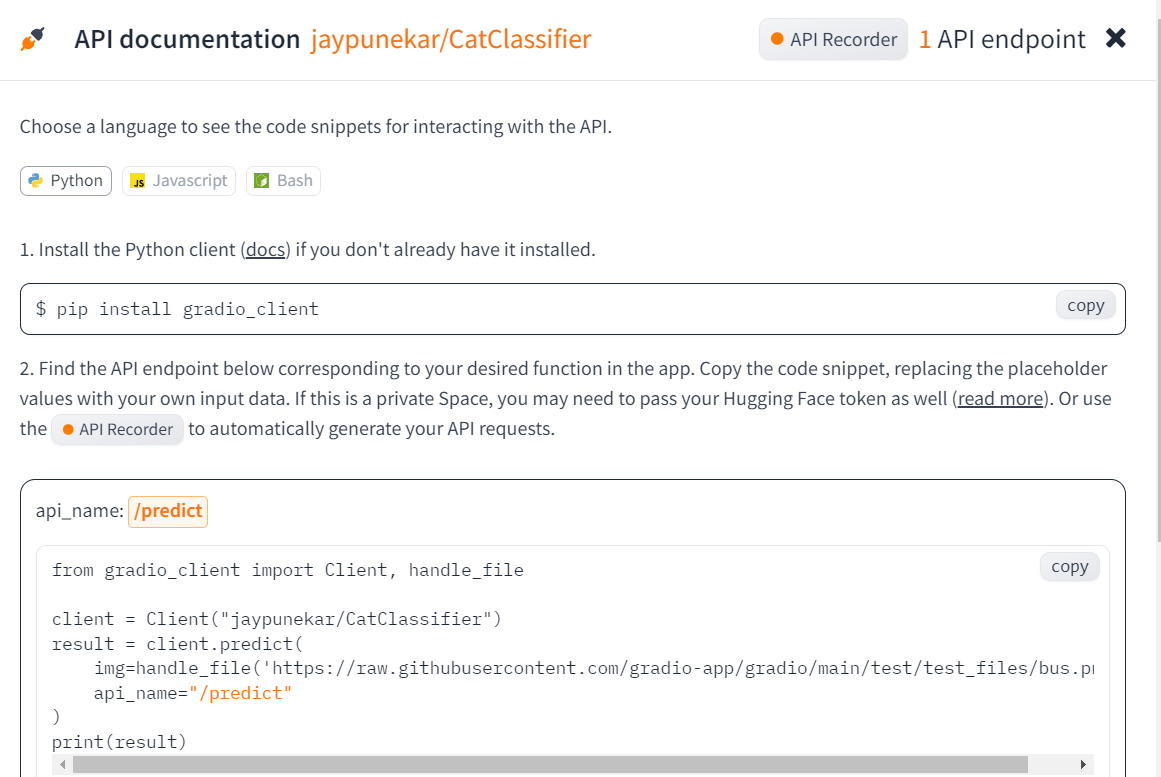
Using as API
If you want to use this model with front-end technologies like React or Vue, you need to access it via an API.
![]()
You can find the instructions for using the API on the API page.
Conclusion
In this blog, we covered the entire process of deploying a Computer Vision model using Gradio and Hugging Face. We started by creating the necessary files (app.py and requirements.txt) and then successfully deployed our model to the web. We also tested the deployed model and explored how to access it via an API for integration with front-end technologies.
Feel free to experiment with your own model and explore different features offered by Gradio and Hugging Face. If you have any questions or run into issues, don’t hesitate to reach out.